Today we introduce database connectivity. We'll start with basic connection, loading what we call a dataset, and navigating through it.
In simple terms, imagine a dataset as a grid; picture an Access table in your mind. VB needs something called a connection - the pipe through which VB can communicate to the database. We will send commands down to the database, and the database will send back what we used to call a recordset - data arranged in rows and columns. VB uses something called a data adapter, that allows use of multiple types of data (not just a table, but excel or CSV files).
Once we have the items in a grid, each record has a row number, and there is a count of the number of records in the grid. We have an invisible cursor that is always sitting on a row. We can move this cursor along the rows, as long as we keep track of the current row number.
So, the progression, from the VB side:
- Create a connection (the pipe)
- Create a dataset (the grid shaped box variable)
- Create a data adapter (the structure that tries to make mapping different data types easier from VB to access)
- Point the connection to the database with something called a connection string (similar to the phone - the connection string is the number to connect to, while the wires are the pipe through which the call is placed)
- Send a SQL statement down through the connection
- Database returns a grid of records
- The grid is placed into the dataset and given a name that VB can reference
- Navigate/manipulate the records
So, let's get started.
- Create a new project. Save it LOCALLY, and take note of the location. Make sure to do the Save All command as soon as your form appears.
- In the Solution Explorer, there is a tab called Data Sources - switch to this tab.
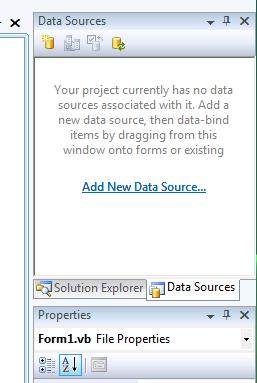
- Click Add New Data Source.
- In the Dialog box "Choose a Data Source Type", choose Database, and hit Next.
- In the Dialog Box "Choose Your Data Connection", choose New Connection. We need to build the connection described above. You now need to set the following properties in the "Add Connection" Dialog:
- Data Source: Choose Change, and select Microsoft Access Database File (OLE DB)
- Database File Name: Hit Browse, and select your Access .mdb file.
- The "Log on to the database" values can be left alone.

- Hit Test Connection. If it worked, you will a messagebox saying "Test connection succeeded." Hit ok to dismiss this dialog, and then OK in the Add Connection box.
- You are taken back to the "Choose Your Data Connection" (it was in the background); hit Next.
- You will now see a screen that says "The connection you selected uses a local data file that is not in the current project...":

You will click Yes to this - it means your database will be copied a distributed with your program. Note - this means, if you want to work on the database file directly, you need to work on the copy INSIDE your VB project folder!
- Next, you see the dialog "Save the Connection String to the Application Configuration File". Make sure "Yes, save the connection as" is checked, and hit next.
- Next, we see "Choose your Database Objects". Click the Plus to expand Tables, and then check the box next to your primary table:

- Hit Finish.
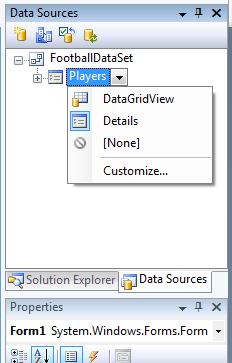
- Now, your dataset is ready to go. You can Drag and Drop values from this set in one of two ways:
- Details - creates individial Textboxes/Drop-downs/checkboxes for values, as appropriate
- DataGridView - creates a grid (like looking at the table in Access) that can be manipulated.
- Lets create a details sheet. Choose Details from the Data Sources tab for your table:
- Now, Drag the icon (Mine is called players, yours may vary depending on the name of your table) onto the form. VB will think for about a minute, and then add boxes for each column, and a navigation/manipulation bar at the top of the form:
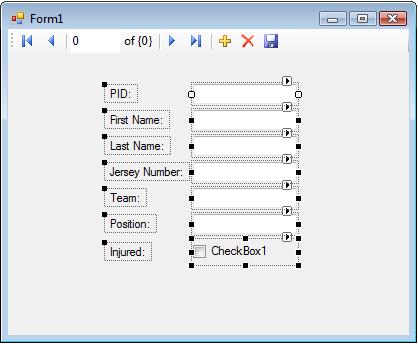
- Try it out!